
InsightsPulse Report Viewer User Guide
This guide explains how report viewers can log in, access dashboards, open and maximize reports, manage their profile, update password, hide/show menu, and logout from the InsightsPulse portal.
1. Overview
The InsightsPulse Report Viewer is a secure web application where you can see all BI reports allotted to you by your organization. You can:
- Log in with your credentials and access your dashboard.
- Browse the list of available reports and categories.
- Open reports, filter data, switch tabs and maximize view.
- Bookmark frequently used reports.
- Update your profile and password.
- Check your recent activity and securely logout.
2. How to Login
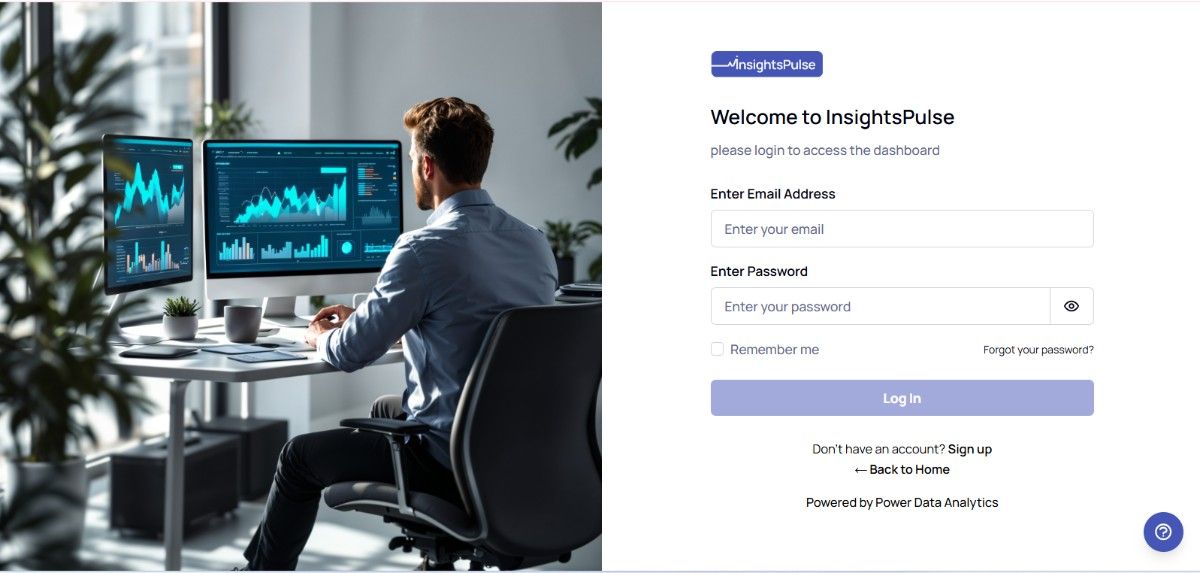
Follow these steps to log in to your InsightsPulse account:
- Navigate to the login portal at
https://insightspulse.in/Login. - Enter your registered email inside the Email Address field (placeholder: Enter your email).
- Type your password in the Password field. Click the Eye Icon inside the password input box to temporarily reveal your typed characters and verify spelling.
- Select the Remember me checkbox if you are on a personal device to remain signed in across browser sessions.
- Click the Log In button to authenticate. Upon success, you will be redirected to the Dashboard Overview.
Additional Login Links:
- Forgot your password? Click this link next to the "Remember me" checkbox if you need to recover access.
- Sign up: If you do not have an account, click the Sign up link at the bottom of the card to self-register. You will be automatically associated with your organization based on your email domain or configuration.
- Back to Home: Click the ← Back to Home button to return to the public landing page.
3. How to Recover Password (Forgot Password)
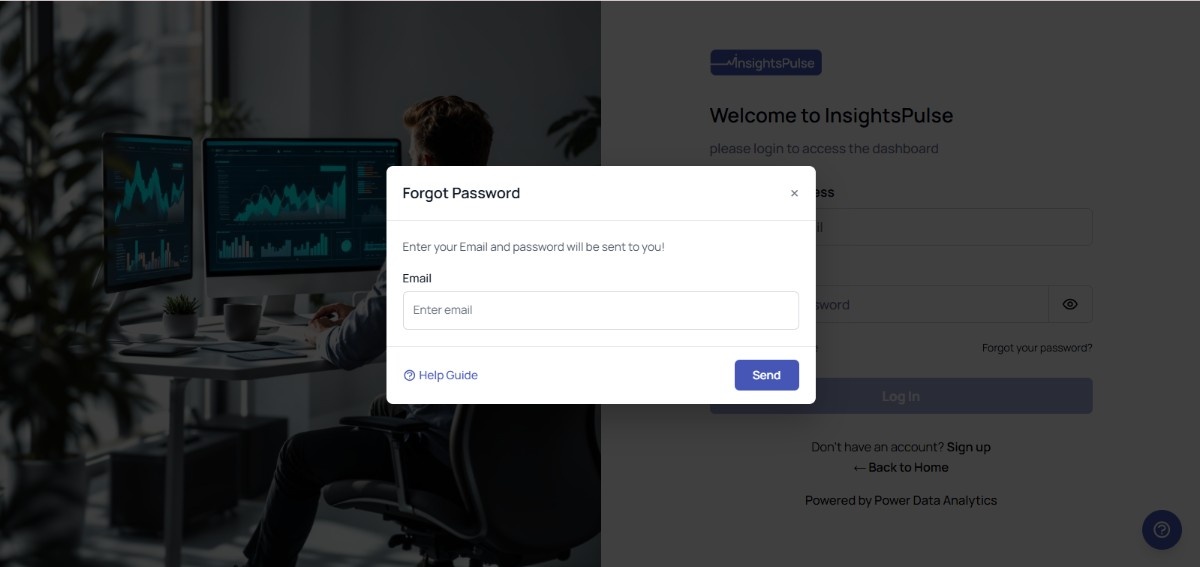
If you have forgotten your login password, recover it using the password recovery modal overlay:
- On the login page, click on the Forgot your password? link.
- A Forgot Password modal window will pop up on top of the login page.
- Enter your registered account email inside the Email field (placeholder: Enter email).
- Click the blue Send button to submit.
- Check your registered email inbox for the system-generated credentials or reset instructions.
- Use the received password to sign in. Close the modal by clicking the × close icon on the top-right corner to return to the login screen.
If you don’t receive the recovery email within a few minutes, check your spam/junk email folder or reach out to your system administrator.
4. Dashboard Overview
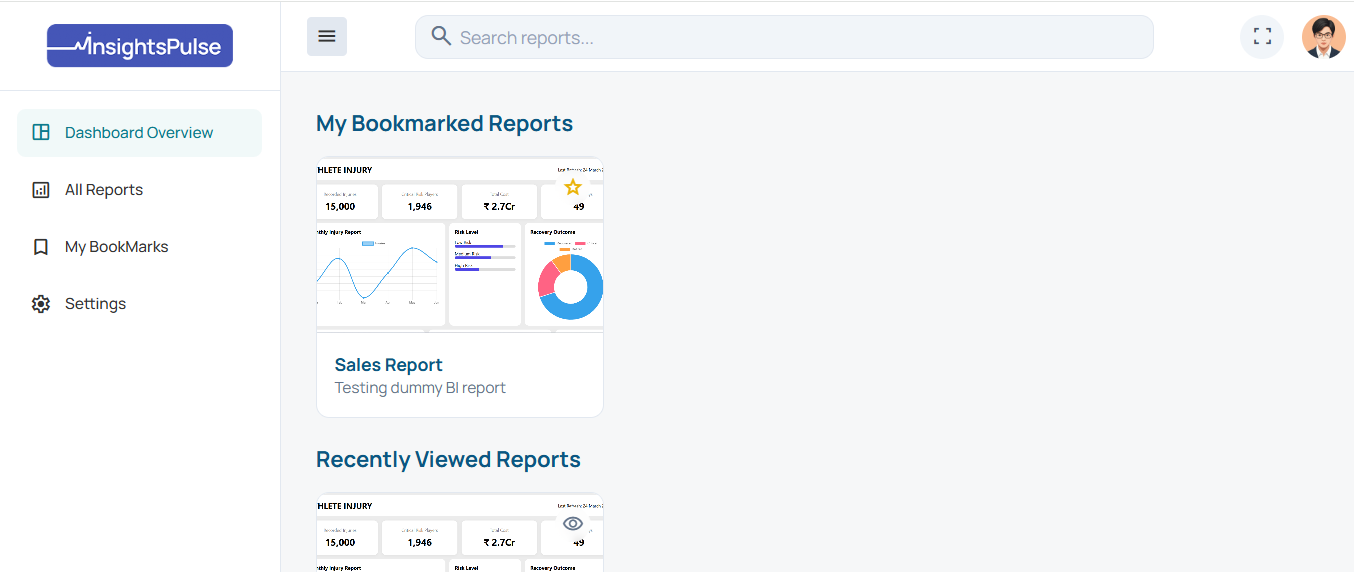
The Dashboard Overview is the primary landing page upon logging into the InsightsPulse portal. It is designed to give you instant access to your most frequently used and recently accessed reports.
Dashboard Components:
- Navigation Sidebar (Left Panel):
- Dashboard Overview: Link to return to this home dashboard screen.
- All Reports: Access the complete directory of reports assigned to you.
- My BookMarks: Quick list of reports you have marked as favorites.
- Settings: Manage profile picture, name, and password security.
- Logout Button: A dedicated exit button at the bottom of the sidebar to sign out securely.
- Global Header Controls:
- Sidebar Toggle: Click the menu icon (three lines) to collapse the sidebar for a wider report viewing area.
- Search Reports Bar: Query across all allowed reports instantly by typing their title.
- Maximize Toggle: Click the square icon near the top-right of the report viewer to expand the view.
- User Profile Info: Displays your display name and registered email address.
- My Bookmarked Reports: Displays cards for reports you have starred for quick access. If no reports are bookmarked, it displays: "No bookmarked reports found".
- Recently Viewed Reports: Lists your history of recently viewed reports to help you pick up where you left off. If you haven't opened any reports, it displays: "No recently viewed reports found".
5. All Reports
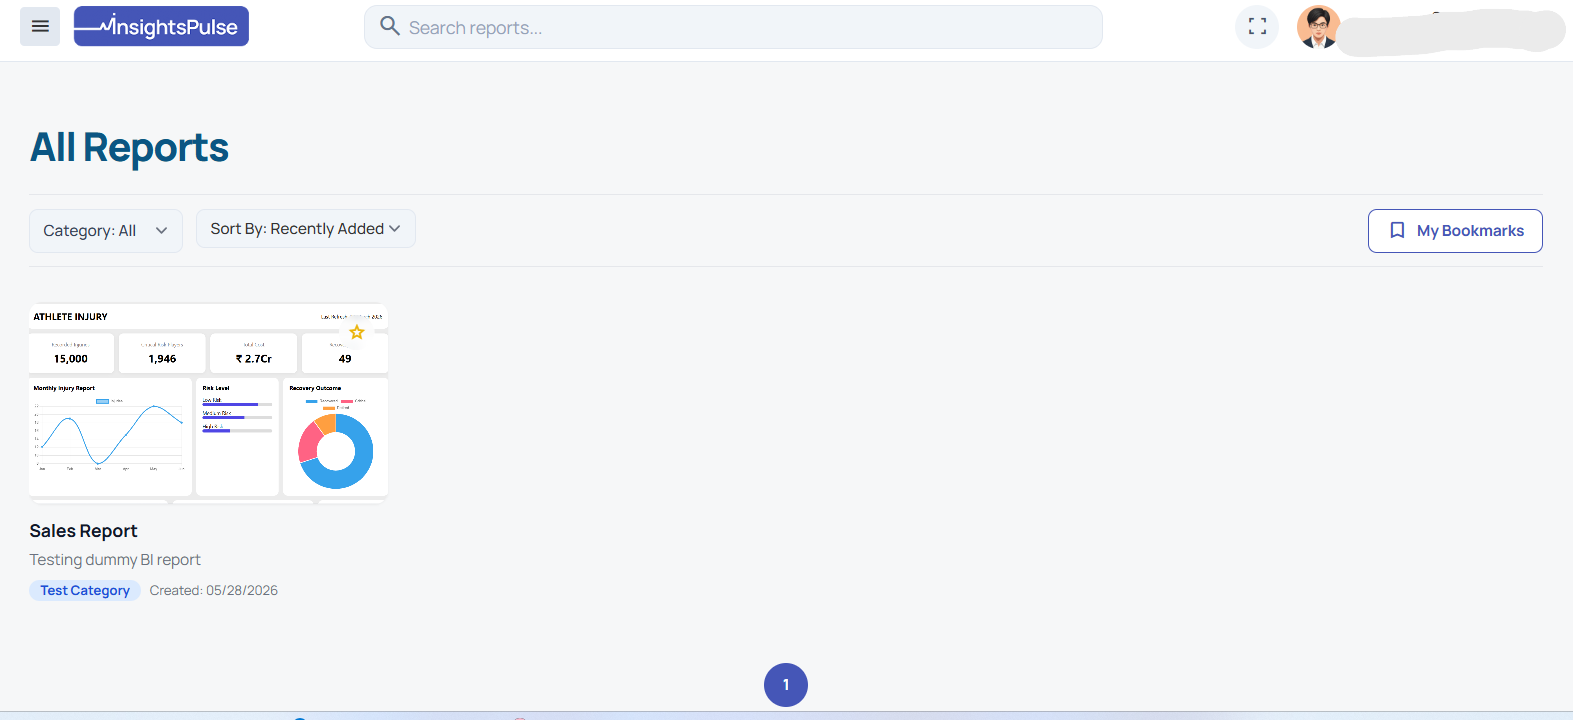
To browse and filter all dashboards and report engines assigned to you, click on All Reports from the left sidebar navigation menu.
1. Directory Filter & Sorting Controls
The directory toolbar allows you to refine your reports listing quickly:
- Category Selector: Use the Category dropdown (e.g. All, or specific business domains) to show reports belonging only to a chosen department or group.
- Sort Order: Use the Sort By dropdown (e.g. Recently Added) to reorder the report cards by creation date or alphabetical name.
- My Bookmarks Button: Click the My Bookmarks button on the right of the filter toolbar to immediately filter the view to display only your starred favorite reports.
- Global Header Search: Type keywords in the Search reports... bar at the top header to dynamically match titles.
2. Reports Grid Display
- Report Gallery Cards: Assigned dashboards are displayed as visual cards containing thumbnail previews, category tags, titles, and short descriptive text. Clicking a card opens the report in the interactive viewer.
- Empty State Placeholder: If no reports are found in your organization workspace, or if your current filters yield zero matches, the dashboard displays: "No Report Found".
6. My BookMarks
The My BookMarks page is a dedicated space to organize and quickly access the reports you use most frequently. It acts as a filtered index of your favorite reports.
1. Bookmark Filters & Sorting
Just like the All Reports directory, you can filter and reorder your favorited items:
- Category Selector: Filter your bookmarked reports by selecting specific categories from the Category dropdown.
- Sort Order: Reorder your bookmarked list using the Sort By dropdown (e.g. Recently Added).
2. Empty Bookmarks State
If you haven't starred any reports yet, or if no bookmarks match your current category filter, the page displays: "No bookmarked reports found."
7. How to View & Maximize the Report
After you click on a report from the list, it opens inside the Report Viewer. This is an embedded BI report (Power BI / Tableau etc.).
7.1 View the report
- Select the desired report from the left menu or report list.
- Wait for the report to load completely in the center area.
- Use any available tabs at the bottom (e.g., Overview, Operational Overview, etc.) to switch between pages.
- Use filters on the left/right panel inside the report to narrow down data.
7.2 Maximize the screen
To focus on the report only and hide browser distractions:
- Look for the square icon near the top-right of the report viewer.
- Click the icon – the report will switch to full-screen mode.
- To exit full-screen, press Esc or click the square icon again.
7.3 Exporting / Downloading Data
Depending on your report engine (like PowerBI or Tableau) and permissions:
- Look for an Export or Download icon within the report's toolbar (often located at the top-right or within a 'More Options' menu).
- You can typically download the data in CSV or Excel formats for further analysis.
7.4 Troubleshooting (Inactive Plan)
If you see an error indicating that your report or organization is inactive:
- Check with your organization's administrator to ensure that your subscription plan is active and in good standing.
- The report may be hidden if the billing cycle has lapsed or the trial period has expired.
8. How to Hide / Access the Menu (Sidebar)
Sometimes you may want more space for the report and less space for the left sidebar menu. You can easily hide or show the menu using the toggle:
- Locate the menu icon (three horizontal lines) at the top-left, next to the InsightsPulse logo.
- Click the icon to collapse the sidebar. Only icons may remain visible.
- Click the icon again to expand and bring back the full menu text.
This helps you see more of the report, especially on smaller screens.
9. Settings
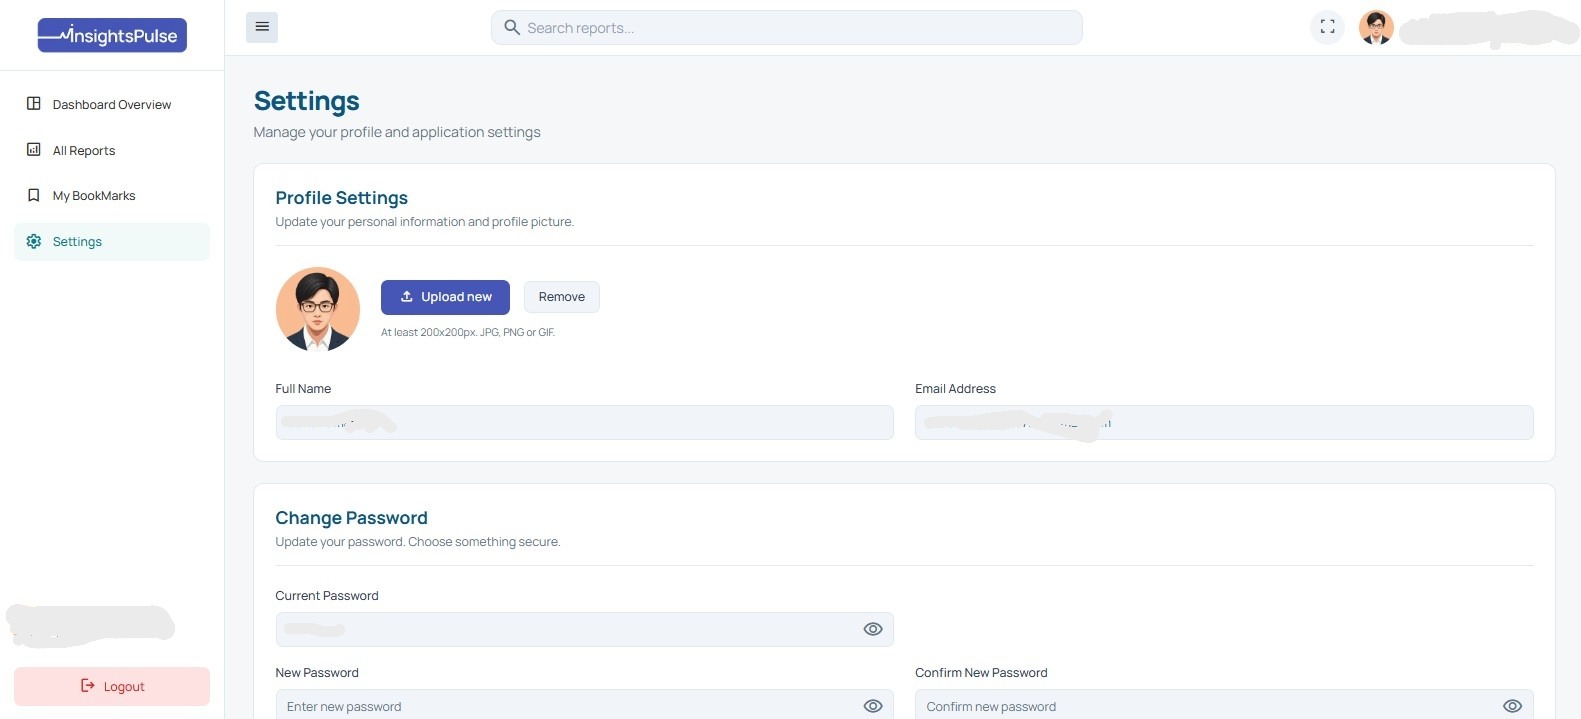
The Settings page allows you to manage your personal profile information, upload avatar graphics, and configure password credentials to secure your account.
9.1 Profile Settings
Manage your display identity and avatar details inside this panel:
- Profile Avatar: Displays your active profile picture.
- Click Upload new to select a new image. Supported formats include JPG, PNG, or GIF, with recommended minimum dimensions of 200x200px.
- Click Remove to delete your custom uploaded picture and revert to the default avatar initials.
- Full Name: Enter or edit your full display name.
- Email Address: Displays your registered email address (this is typically set by your organization and might be read-only).
9.2 Change Password
Update your login credentials securely inside the credentials panel:
- Current Password: Type in your active account password. Click the Eye Icon to reveal the hidden characters.
- New Password & Confirm: Type the desired secure password in the New Password field, and re-type it exactly in the Confirm New Password field. Use their respective eye icons to double-check spelling.
9.3 Action Buttons
- Cancel: Click Cancel to revert any changes and restore the previous settings.
- Save Changes: Click Save Changes at the bottom right to apply all updates to your profile and security credentials.
10. How to Logout
For security reasons, always log out after using the portal—especially on shared systems.
- Locate the Logout button in the left sidebar menu.
- Click Logout.
- You will be redirected to the login page and your session will be closed.
If you simply close the browser tab without logging out, your session may remain active for some time, depending on your organization's security settings.
11. How to Access Help
If you encounter any issues or need assistance while using the InsightsPulse portal, you can easily access our help and support resources at any time.
- Look for the circular Blue Help Icon (?) located at the bottom right corner of the screen (as seen on the login page).
- Click the icon to open the support widget overlay.
- From here, you can search for help articles, browse FAQs, or send a direct message to our support team for troubleshooting.
Alternatively, you can click the Support link in the top navigation bar to be redirected to our main contact and support page.